Mold Remediation Guide: Complete Step-by-Step Removal & Prevention
Why Mold Remediation Matters
Mold is more than just an unsightly nuisance—it can seriously threaten your health, damage property, lower home value, and lead to expensive repairs if left unchecked.
Who This Guide Is For
This comprehensive guide is designed for homeowners, renters, landlords, property managers, and professionals alike. Whether you’re facing a minor patch behind your bathroom sink, a large outbreak after flooding, or persistent musty odors without visible signs, you’ll find everything you need here: scientific background, step-by-step removal, scenario-specific tips, tool checklists, prevention strategies, and when to call in the pros.
The Risks of Ignoring Mold
- Toxic spores can cause lasting respiratory problems, especially for children, the elderly, and those with pre-existing health issues.
- Mold can destroy drywall, wood, carpet, insulation, and even structural components of a building.
- Property values may decrease, and remediation costs can skyrocket if problems are left untreated.
- Mold spreads quickly, thrives in hidden places, and is often missed until the health or financial toll is severe.
This Guide Covers:
- How to identify mold (visible & hidden signs)
- Health risks and symptom progression
- When to call a professional (and why it matters)
- Assessment, planning, and tool checklists
- Step-by-step remediation protocols for every scenario
- Long-term prevention strategies and seasonal tips
- Special situations (multi-family, rentals, post-flood, more)
- Deep links to scenario-specific guides for houses, cars, boats, furniture, and more
Step 1: Identification – Spotting Mold Early
Why Early Identification Matters
Mold often starts in hidden or overlooked places and may cause health effects before it becomes visible. Recognizing the signs early can prevent thousands of dollars in damage and protect your household.
Common Visible Signs
- Colors: Black, green, white, orange, or pink fuzzy spots
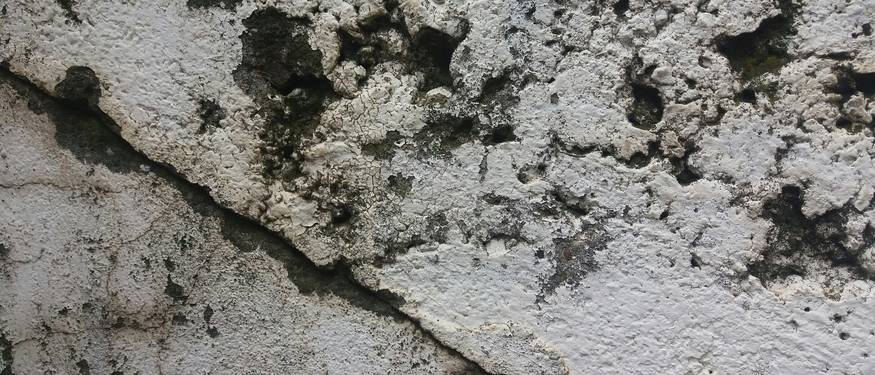
- Textures: Slimy, fuzzy, powdery, or velvet-like patches
- Growth patterns: Spreading colonies, clusters, or streaks—often in corners or along baseboards
- Typical locations: Bathrooms, basements, kitchens, attics, window sills, under sinks, around HVAC vents
Hidden Signs & Cases
- Musty, earthy, or damp odors—even if no visible mold is present
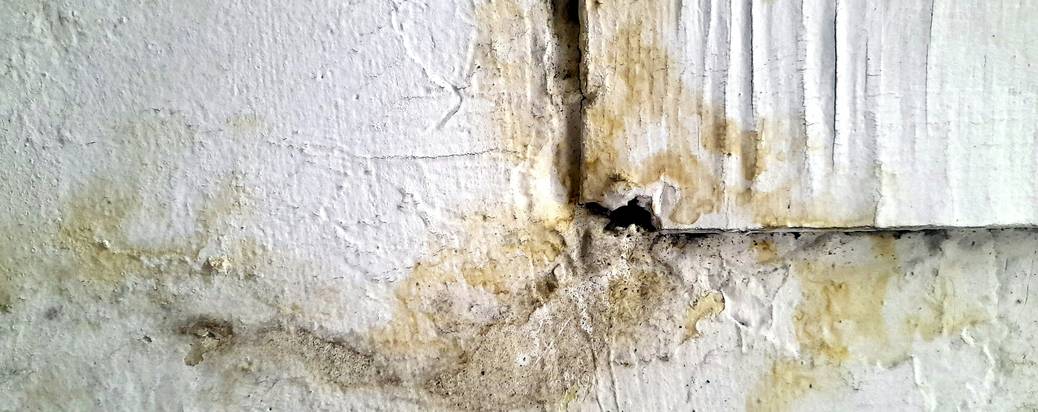
- Stains, bubbling paint, warped drywall, peeling wallpaper
- Increased allergy symptoms or headaches in certain rooms
- Persistent dampness in basements, crawlspaces, or under flooring
- Condensation on windows or cold surfaces
Case Examples:
- Home: After a minor pipe leak in the kitchen, a musty smell persisted. Lifting the baseboard revealed black mold spreading underneath.
- Apartment: A tenant noticed peeling paint and coughing that worsened at home. Mold was later found growing inside the wall behind a bathroom sink.
- Vehicle: A forgotten water spill under a car mat caused persistent mildew smell—green mold was discovered on the carpet and underlayment after weeks.
Step 2: Health Risks – Know the Dangers Before You Start
Mold exposure can trigger a wide range of health issues, from mild irritations to severe respiratory problems. Certain populations—including children, seniors, pregnant women, those with asthma, allergies, or weakened immune systems—face the highest risks.
- Short-term symptoms: Sneezing, coughing, runny nose, red or itchy eyes, skin rashes, sinus congestion, sore throat.
- Chronic/long-term effects: Asthma flare-ups, persistent headaches, memory issues, fatigue, worsening of chronic lung conditions.
- Toxic molds: Some species (including Stachybotrys, or “black mold”) produce mycotoxins, which may cause neurological or immune effects in rare cases.
- Vulnerable populations: For infants, elderly, pregnant, immunocompromised, or recently ill individuals, even minor exposure can cause major problems. Avoid exposure entirely during remediation.
Learn more about health effects of mold.
How Symptoms Can Progress
- Initial symptoms may mimic seasonal allergies—sneezing, watery eyes, or headaches—but persistent symptoms should raise concern.
- Long-term exposure can sensitize the immune system, making future reactions more severe.
- Chronic mold exposure is associated with increased asthma attacks, fatigue, memory issues, and in rare cases, neurological symptoms.
Scientific Context
Mold spores are microscopic and can become airborne, infiltrating air ducts and settling throughout your home. Chronic exposure—even at low levels—can sensitize the immune system and lead to long-term issues, especially for those with underlying conditions.
When to Call a Professional
While many small mold problems can be handled with DIY methods, certain situations call for professional help. Knowing when to call in the pros can save you time, money, and protect your health.
- The affected area is larger than 10 square feet (about a 3x3 ft patch).
- Anyone in the household is high-risk (children, elderly, immunocompromised, pregnant).
- Mold is growing inside HVAC or ductwork, or is widespread in hidden locations (inside walls, under flooring, attics).
- Post-flooding or major water damage—especially if materials remain wet for over 48 hours.
- Previous remediation attempts failed or mold keeps returning.
- You need official documentation for landlords/insurance.
Remediation Planning: Assess, Prepare, and Protect
Before you start scrubbing, it’s crucial to assess the scope of your mold problem and plan the remediation. This ensures safety, efficiency, and prevents accidentally spreading spores throughout your home.
How to Assess the Scope:
- Estimate the size of the affected area: Small (under 10 sq ft), Medium (10–30 sq ft), Large (over 30 sq ft).
- Identify all affected materials: drywall, carpet, wood, insulation, fabric, HVAC, etc.
- Check for hidden spread: inside walls, under floors, in attics, behind baseboards, under sinks, in crawl spaces.
- Determine the source of water or moisture—leak, condensation, flooding, high humidity. If you can’t find the source, address this first before remediation.
DIY or Professional?
- Choose DIY for: Small, isolated, accessible patches on non-porous surfaces and if you’re healthy and comfortable with basic repairs.
- Choose Professional for: Large/multiple areas, black mold, hidden or recurring mold, high-risk occupants, or complex building structures.
Gather Essential Tools & Supplies:
- N95 or better respirator
- Disposable gloves, eye protection
- Plastic sheeting, duct tape
- HEPA vacuum, cleaning solution (soap, vinegar, or specialty product)
- Scrub brushes, disposable towels
- Dehumidifier, fans
- Moisture meter (recommended for checking hidden dampness)
Step 3: Remediation – Step-by-Step Mold Removal Process
Disposal Tip: Double-bag contaminated materials and dispose according to local regulations.
Step 4: Mold Prevention – Long-Term Strategies
Preventing mold is an ongoing process. Even after successful remediation, vigilance and good habits are key to keeping your space mold-free.
- Control humidity: Use dehumidifiers and air conditioning. Keep indoor humidity below 50% (ideally 30–45%).
- Fix leaks fast: Repair plumbing, roofs, or window leaks within 24–48 hours.
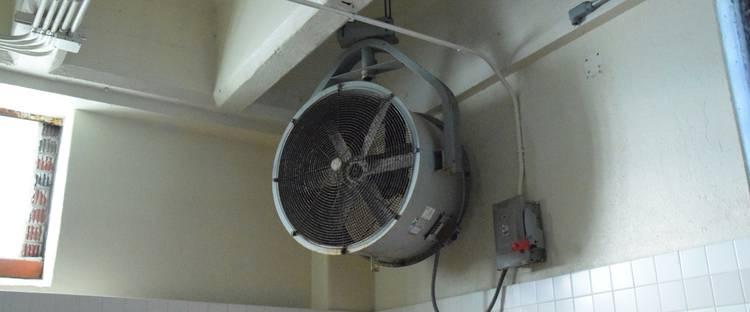
- Ventilate: Use exhaust fans in bathrooms, kitchens, and laundry rooms.
- Clean regularly: Dry any damp areas after spills. Mop up standing water promptly.
- Check hidden spots: Basements, attics, crawl spaces, under sinks, behind furniture.
- Upgrade materials: Use mold-resistant drywall, paints, and caulks in bathrooms, kitchens, and basements.
- Monitor: Use humidity meters in high-risk rooms. Consider smart monitors for remote alerts.
- Seasonal tips: After storms or flooding, inspect for leaks and wet spots. In humid months, increase ventilation and check for condensation.
- Keep indoor humidity <50%
- Repair leaks within 24–48 hours
- Ventilate high-moisture rooms
- Clean and dry after spills/floods
- Inspect hidden areas monthly
- Upgrade to mold-resistant materials where possible
Remediation in Special Situations
Mold remediation can get complicated in certain environments. Here’s how to adapt your approach for unique situations:
Multi-Family Buildings & Apartments
- Report promptly: Notify landlords or property managers as soon as mold or water damage is discovered.
- Document everything: Take photos, keep written communication, and submit maintenance requests in writing.
- Coordinate: Work with neighbors if mold may spread between units.
- Legal: See our Mold in Apartments guide for tenant and landlord responsibilities.
Rental Properties (Landlords & Tenants)
- Tenants: Report leaks/mold immediately; do not attempt large-scale remediation yourself.
- Landlords: Address issues promptly, hire professionals for large or hidden problems, follow legal requirements for notice and documentation.
After Flooding or Water Damage
- Act fast: Mold can start growing within 24–48 hours. Begin drying immediately.
- Dry thoroughly: Remove all standing water, dry every affected surface and cavity.
- Remove saturated materials: Carpets, drywall, insulation often need to be replaced.
- Professional help: For major flooding, always use a certified remediation company.
Scenario Overviews: Mold Remediation by Location
Mold remediation isn’t one-size-fits-all. The best approach varies greatly by environment, affected materials, and cause of mold. Explore scenario-specific guides below for detailed protocols, safety tips, and prevention strategies tailored to your needs.