Ceiling & Wall Mold Removal: Signs, Safe Cleaning, and Prevention
Mold on ceilings and walls isn’t just unsightly—it signals moisture problems and puts your home and health at risk. Whether you’re dealing with black spots on drywall, stains above a shower, or hidden mold spreading behind paint, this guide will walk you through how to remove mold from ceilings and walls, when replacement is needed, and how to keep it from coming back. Get actionable, step-by-step instructions, safety tips, and answers to common questions about wall and ceiling mold.
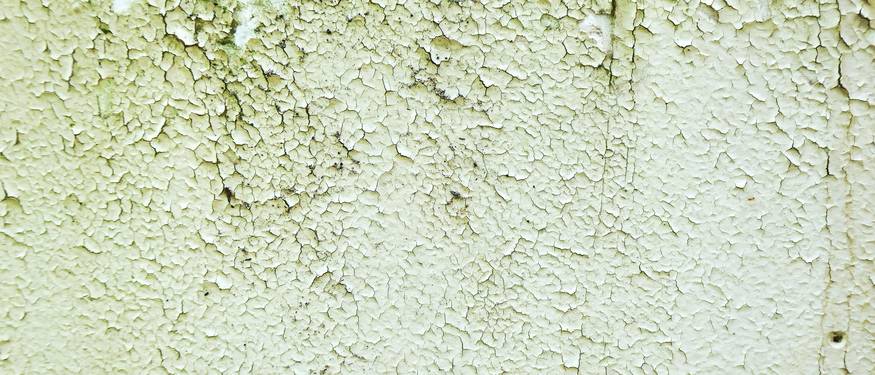
Identifying Mold on Ceilings & Walls
Mold on walls and ceilings often appears as:
- Black, green, brown, or white spots—sometimes fuzzy, slimy, or powdery.
- Water stains, yellowing, or irregular dark patches spreading outward.
- Bubbling, peeling, or cracked paint (especially near leaks or in bathrooms).
- Musty or earthy odors that persist even after cleaning.
Checklist: Signs of Mold in Drywall & Ceilings
Learn more about identifying hidden and visible mold
See types of mold found on walls and ceilings
- Discoloration or dark spots (especially after water damage)
- Patches that grow or change shape over time
- Persistent musty smell in a room
- Paint that bubbles, chips, or flakes near corners or ceiling lines
- Soft or warped drywall/plaster when pressed
Safe Mold Removal from Walls & Ceilings
Removing mold from drywall, plaster, or ceiling tiles requires careful preparation and the right tools. Here is a step-by-step guide to cleaning mold off painted walls and ceilings:
- Wear PPE: N95 mask/respirator, gloves, goggles, and disposable coveralls.
- Isolate the area: Seal off doors, vents, and floors with plastic sheeting and painter's tape.
- Remove loose debris: Use a damp cloth or vacuum with HEPA filter.
- Choose a cleaner: Use an EPA-registered mold remover or a mix of 1 cup bleach per gallon of water (for non-porous surfaces only). For porous drywall, bleach does not penetrate—removal may be necessary.
- Scrub the surface: Use a soft brush or sponge. Don’t oversaturate walls—work in small sections.
- Rinse and dry: Wipe with clean water and dry quickly using fans or dehumidifiers.
- Dispose of materials: Double-bag wipes, sponges, and any removed drywall for safe disposal.
Safety Tips:
- Never mix bleach with ammonia or other cleaners
- If mold covers more than 10 sq. ft., call a professional
- Children, elderly, and those with health issues should leave the area during remediation
Materials & Tools Needed:
- N95 respirator, goggles, gloves, coveralls
- Plastic sheeting, painter's tape
- EPA-registered mold cleaner or bleach/water (not for porous walls)
- Soft scrub brush, sponge, disposable rags
- HEPA vacuum
- Fans, dehumidifier
- Garbage bags for debris
Common Mistakes: Painting over mold, skipping containment, or using only basic cleaners on deep mold will result in regrowth and further damage.
See full home mold remediation steps
When to Replace Drywall, Plaster, or Ceiling Tiles
Sometimes, cleaning isn’t enough. When should you replace drywall or ceiling tiles after mold?
- Mold is visible inside or throughout the drywall or ceiling tile (not just the surface).
- Material feels soft, crumbles, or has a "musty" smell even after initial cleaning.
- Repeated mold growth after cleaning.
- Water damage caused sagging or warping.
How to Remove Moldy Drywall or Ceiling Tiles:
- Cut at least 12 inches beyond visible mold.
- Bag all debris before moving through the home.
- Use proper PPE and isolate the area.
- Vacuum surrounding framing (studs, joists) with a HEPA vacuum before installing new material.
Note: If you find hidden mold behind walls, or extensive damage, see our full home remediation guide or contact a professional for assessment.
Repainting Ceilings and Walls After Mold Removal
Once surfaces are clean, dry, and mold-free, repainting helps restore appearance and protect against future growth. Mold resistant paint for bathrooms and ceilings can add another layer of defense.
Checklist: Repainting After Mold Removal
See ongoing prevention strategies
- Confirm all surfaces are fully dry and free from mold stains
- Apply a mold-resistant primer (e.g., Zinsser Mold Killing Primer)
- Use mold-resistant paint—especially for bathrooms, kitchens, and basements
- Follow manufacturer’s dry/cure times before use
- Maintain ventilation and monitor for any recurrence
Preventing Mold on Ceilings & Walls
- Keep indoor humidity below 50% (use dehumidifiers in basements and bathrooms)
- Repair leaks promptly—roofs, windows, pipes, and AC units
- Ensure bathrooms, kitchens, and laundry rooms are well ventilated
- Use exhaust fans during and after showers or cooking
- Check for hidden mold after any water incident or flood
Top 3 Prevention Tips
- Run exhaust fans or open windows in humid rooms
- Inspect ceilings and walls after storms or leaks
- Maintain caulking and grout in wet areas
Common Mistakes to Avoid: Ignoring small leaks, painting over stains, or skipping proper drying after cleaning.
Go to Home Mold Remediation Guide
Frequently Asked Questions: Ceiling & Wall Mold
No. Painting over mold does not kill it and will lead to continued growth under the paint, causing blistering, peeling, and health risks. Always remove mold fully, dry surfaces, then use a mold-resistant primer and paint. See step-by-step removal instructions above.
Mold may look like spots, fuzzy patches, or stains. If it grows, feels slimy/fuzzy, or is accompanied by musty odor, it’s likely mold—not just a stain. Black, green, or brown spots that appear after water damage are almost always mold. Unsure? See our Identifying Mold guide or consult a professional.
If mold is only on the surface of the drywall and is caught early, you may be able to clean it with appropriate products. If mold has penetrated the drywall (soft, crumbling, or deep stains), the affected section should be removed and replaced. See the "Material Replacement" section above for a safe process.
Use an EPA-registered mold cleaner or a diluted bleach solution (1 cup bleach to 1 gallon water) for non-porous painted surfaces. Scrub gently, rinse, and dry thoroughly. For porous or badly damaged paint, removal may be needed. Never mix cleaning chemicals, and always ventilate the area.